There’s a quiet magic in the aroma of freshly baked bread – a warm invitation that transforms any kitchen into a cozy haven. Yet, for manny, the thought of kneading dough for hours feels more like a chore than a craft. Enter no-knead baking: an effortless revolution that marries simplicity with artisan quality. In this guide, we’ll unravel the secrets of no-knead bread, showing you how to achieve crusty, flavorful loaves with minimal hands-on time. Whether you’re a seasoned baker or a curious beginner, prepare to discover how patience and a few simple ingredients can yield bread that’s truly worth savoring. Welcome to the world of effortless artisan bread.
Effortless artisan bread begins with understanding the beautiful chemistry that transforms simple ingredients into a rustic masterpiece. The no-knead method, celebrated for its ease and remarkable texture, hinges on long fermentation and moisture, allowing natural enzymes and wild yeast to develop flavor and structure without the physical labor of kneading.
The Science Behind No-Knead Bread and Why it effectively works
at the heart of this method is patience. By mixing flour, water, salt, and a tiny bit of yeast, then letting it rest for 12 to 18 hours, the dough undergoes a slow fermentation. This time lets gluten strands form gently and extensively, developing a supple crumb. Simultaneously occurring, starches break down into sugars, feeding yeast and bacteria that produce aromatic acids, enhancing flavor complexity far beyond what quick kneading can achieve.
Because the dough is wetter than conventional bread recipes, it becomes stickier and more fluid. This higher hydration encourages an open crumb with irregular, airy holes-an unmistakable hallmark of artisan bread-while letting the flour naturally absorb water steadily for better gluten formation.
Choosing the Perfect Flour and Ingredients for Artisan Quality
For optimum results, selecting the right flour is paramount. unbleached bread flour with high protein content (around 12-14%) offers the necessary gluten strength to create structure during long fermentation. Mixing in a portion of whole wheat flour or rye flour adds complexity and depth, but keep whole grains under 20% to maintain a light crumb.
Use filtered or spring water free of chlorine, so the yeast breathes freely. A pinch of fine sea salt enhances flavor without hampering fermentation, and only a tiny amount of fast-acting yeast or active dry yeast is needed-this slow rise is what elevates flavor beyond typical bread.
Mastering the Ideal Fermentation Time for Maximum Flavor
Timing is your best ally. after mixing your dough, cover it tightly and leave it at room temperature for at least 12 hours; 16 to 18 hours is ideal. You’ll notice the dough doubles, bubbles appear, and it becomes more elastic and easy to stretch. Longer fermentation increases acidity slightly, which balances the mild sweetness and imparts that mildly tangy artisan note.
If time permits, a short cold ferment (refrigeration overnight after the initial rise) can further mellow flavor complexity and make the dough easier to handle.
Baking Techniques to Achieve a Crispy Crust and Tender Crumb
The secret to a crackling crust lies in steam and high heat. Preheat your oven to 450°F (232°C) with a Dutch oven or heavy lidded pot inside. Once the dough is shaped and rested, carefully transfer it into the hot vessel, cover, and bake for 20 minutes. Trapping steam inside hydrates the crust’s surface, allowing it to expand before hardening.
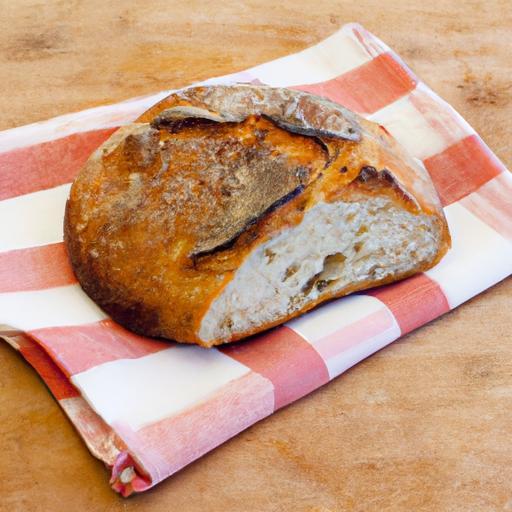
After the lid is removed, continue baking for another 20 to 25 minutes to develop a deeply caramelized, golden crust. The no-knead bread emerges with a crunchy exterior and pillowy-soft interior, perfect for slicing thick with butter or serving alongside hearty soups.
Prep and Cook Time
- Preparation: 15 minutes
- Fermentation: 12-18 hours
- Baking: 40-45 minutes
- Total Time: Approximately 13.5-19 hours (mostly hands-off)
Yield
1 loaf (serves 8)
Difficulty Level
Easy – Ideal even for novice bakers seeking artisan results
Ingredients
- 3 cups (360g) unbleached bread flour, sifted
- 1/4 teaspoon instant yeast
- 1 1/4 teaspoons fine sea salt
- 1 1/2 cups (360ml) filtered room-temperature water
- Optional: 1/2 cup whole wheat flour (replace part of bread flour for nuttier flavor)
Instructions
- Combine dry ingredients: In a large bowl, whisk together the bread flour, yeast, and salt until evenly distributed.
- Mix water and flour: Add water and stir with a wooden spoon or spatula until just combined into a loose, sticky dough. Avoid overmixing-it’s fine to have some dry flour patches.
- First rise: Cover the bowl tightly with plastic wrap or a damp towel. Leave the dough at room temperature (68-72°F) for 12-18 hours. Look for a bubbly, domed surface and a pleasant, slightly yeasty aroma.
- Prepare workspace: Generously flour a clean surface. Using floured hands, scrape the dough gently onto it without deflating too much.Fold once or twice to shape into a rough ball.
- Shape and bench rest: Place dough seam-side down on parchment paper. Cover and let rest for 30 minutes to relax.
- Preheat oven and Dutch oven: Place a heavy Dutch oven or cast-iron pot (with lid) in the oven and preheat to 450°F (232°C) for at least 30 minutes.
- Transfer dough to pot: Lift the parchment with dough and place it in the hot pot. Cover with the lid and bake for 20 minutes.
- Finish baking: Remove the lid and bake for 20-25 minutes more until crust is deep golden brown and crackly.
- Cool completely: Transfer bread to a wire rack and let cool fully before slicing to set the crumb.
Chef’s Notes
- Hydration adaptability: Higher hydration (up to 80%) yields a more open crumb but stickier dough; adjust flour slightly based on humidity.
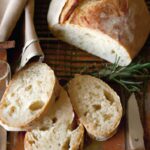
- Flavor twist: Add herbs like rosemary or cracked black pepper during mixing for savory notes.
- Storing & making ahead: Dough can be refrigerated after initial mixing for up to 24 hours; allow it to warm and finish the rise before baking.
- Common pitfalls: Avoid underproofing, which results in dense crumb, by watching for visible bubbles and dome.
Serving Suggestions
This effortless artisan bread shines best simply served fresh with good-quality butter or drizzled olive oil and coarse sea salt. pair it beautifully with vibrant tomato soup,creamy avocado toast,or aged cheeses. Garnish slices with fresh thyme or a sprinkle of flakes of Maldon salt for an elegant touch.

| Nutrient | per Serving |
|---|---|
| Calories | 180 kcal |
| Protein | 6 g |
| Carbohydrates | 36 g |
| Fat | 1 g |
For more artisan bread inspiration and advanced techniques, explore our thorough bread baking guide. To deepen your understanding of fermentation science, this research article provides excellent insights on enzyme activity in dough.
Q&A
Q&A: Effortless Artisan Bread – Your Guide to No-Knead Baking
Q1: What exactly is no-knead bread, and why has it become so popular?
A: No-knead bread is a simple method of breadmaking that requires minimal effort-no vigorous kneading, just a long, slow rise. Its popularity stems from the rustic, crusty loaves it produces with surprisingly little hands-on time. This slow fermentation develops flavor and texture naturally, making artisan-quality bread accessible to home bakers of all skill levels.
Q2: How does the no-knead technique work without kneading to develop gluten?
A: The magic lies in time. Instead of kneading to develop gluten quickly, no-knead dough relies on a long fermentation period-ofen 12 to 18 hours. During this time,the flour hydrates fully,and the gluten forms gradually on its own. The result? A chewy crumb and crispy crust that rival traditional kneaded breads.
Q3: What are the basic ingredients required for no-knead bread?
A: You’ll need just four simple staples: flour, water, salt, and yeast. That’s it! This minimalist ingredient list highlights the beauty of bread baking-transforming humble components into something delightful with patience and warmth.
Q4: Can I customize no-knead bread with additional flavors or ingredients?
A: Absolutely! Feel free to enrich your dough with herbs like rosemary or thyme, add olives for a briny punch, or fold in nuts and seeds for texture. Just remember that additional ingredients may slightly alter rising times, so keep an eye on your dough’s readiness rather than the clock.
Q5: What equipment do I need to make no-knead bread at home?
A: One of the beauties of no-knead bread is its simplicity-in equipment too. A large bowl for mixing, a sturdy spoon, a kitchen scale if you have one for precision, and a heavy lidded pot (like a Dutch oven) to bake in are all you need. The pot traps steam, creating that coveted crisp crust.
Q6: How can I tell when my no-knead dough is ready for baking?
A: The dough should roughly double in size and look bubbly and aerated on the surface. It will feel soft and a bit sticky. Forget exact timings; rely on visual cues and gentle touches. If it hasn’t doubled, give it more time-you’re nurturing your loaf’s flavor!
Q7: What’s the secret to achieving the perfect crust on no-knead bread?
A: The secret is steam. Baking your bread inside a covered heavy pot traps moisture, which steams the dough during the initial bake. This steam helps the crust form beautifully thin and crisp before finishing uncovered to deepen color and crunch.Q8: Can I make no-knead bread without commercial yeast?
A: Yes! Many bakers use a sourdough starter in place of commercial yeast for no-knead breads. It adds wonderful complexity and a tangy flavor. Keep in mind that fermentation times might potentially be longer, and the flavor will differ, reflecting the unique character of your starter.
Q9: How long can I store no-knead bread, and what’s the best way to keep it fresh?
A: Artisan bread is best enjoyed fresh, ideally within two days. To keep it fresh longer, store it in a paper bag or loosely wrapped in a clean kitchen towel-this allows the crust to breathe and stay crisp. For longer storage, slice and freeze; then toast slices directly from the freezer.
Q10: I’m new to baking-how can no-knead bread help me gain confidence?
A: No-knead bread is perfect for beginners! It removes the intimidating kneading step, allowing you to focus on simple mixing, waiting, and baking. Watching your dough rise and transforming it into a golden loaf is incredibly rewarding and invites you to experiment with your own variations as you grow more agreeable.
With these insights, your journey into effortless artisan breadmaking begins. Embrace the slow magic, and soon your kitchen will be filled with the smell of fresh-baked success-no special skills required!
Concluding Remarks
Embracing the art of no-knead baking transforms the humble loaf from a weekend project into an accessible daily delight. With minimal effort and simple ingredients, you unlock the door to artisan bread that boasts a golden crust, airy crumb, and that irresistible homemade warmth. Whether you’re a seasoned baker or just beginning your journey,this effortless approach invites you to savor the magic of breadmaking-no handsore required. So, preheat your oven, mix those few ingredients, and watch as patience and simplicity create the masterpiece that is no-knead artisan bread. Your kitchen, and your taste buds, will thank you.