There’s something undeniably magical about tearing into a warm, crusty loaf of artisan bread-its golden crust crackling beneath your fingers, the soft, airy crumb bursting with flavor. Yet, behind that rustic perfection often lies hours of kneading and skillful technique, intimidating many home bakers before they even begin. What if you could capture that same bakery-quality loaf without the elbow grease or endless patience? Enter the world of effortless no-knead artisan bread: a revolutionary approach that transforms humble ingredients into a masterpiece with minimal fuss. In this article, we’ll unravel the secrets behind this game-changing method, showing you how to bake like a pro in your own kitchen-no kneading required. Get ready to fill your home with the irresistible aroma of freshly baked bread and impress yourself (and your guests) with every slice.
Understanding the Science Behind No-Knead Bread for Perfect texture
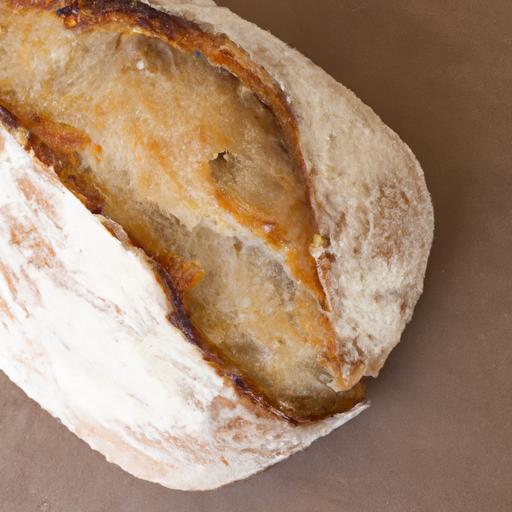
Effortless no-knead artisan bread transforms simple ingredients into a masterpiece through the magic of time and fermentation. Unlike conventional bread recipes demanding vigorous kneading, this technique relies on a slow, extended rise, allowing gluten to develop naturally. This results in an open crumb structure with enchanting air pockets and a tender chew that defines artisan quality. The secret lies in hydration: wetter dough means more extensibility and, combined with the long fermentation, creates those coveted irregular holes and a moist, flavorful interior.
Choosing the Ideal Ingredients to Elevate Your Artisan Loaf
Quality ingredients set the foundation for effortless no-knead artisan bread perfection. High-protein bread flour is essential to develop a strong gluten network during the slow rise. For richer flavor, consider mixing in a portion of whole wheat or spelt flour, but keep it under 25% to maintain loft. The salt not only seasons but tightens gluten strands, controlling fermentation speed for balanced taste. A small amount of instant yeast gently works behind the scenes over 12-18 hours, coaxing out complex flavor nuances without overpowering the dough. Water temperature and purity also influence yeast activity and crumb texture-filtered,room-temperature water is ideal.
Step-by-Step Guide to Preparing and Baking with Minimal Effort
Prep and Cook Time
- Preparation: 15 minutes
- Fermentation: 12-18 hours
- Baking: 45 minutes
Yield
One 1.5-pound artisan loaf suitable for 8 generous servings.
Difficulty Level
Easy – perfect for beginners and seasoned bakers alike.
Ingredients
- 3 cups (360g) bread flour, sifted for lightness
- 1/4 teaspoon instant yeast
- 1 1/4 teaspoons fine sea salt
- 1 1/2 cups (360ml) filtered water, room temperature
Instructions
- Combine dry ingredients: In a large bowl, whisk together the bread flour, instant yeast, and sea salt until evenly mixed.
- Add water and stir: Pour in the water and use a sturdy wooden spoon or spatula to combine until a shaggy, sticky dough forms.The mixture will be loose; resist the urge to add more flour.
- Initial rest: Cover the bowl tightly with plastic wrap or a damp kitchen towel.Let it rest at room temperature for 12 to 18 hours, ideally in a warm spot (around 70°F or 21°C), until bubbly and doubled in size.
- Preheat the oven and Dutch oven: About 30 minutes before baking, place a heavy Dutch oven with its lid inside your oven and preheat to 450°F (230°C). This creates the steamy environment critical for a perfect crust.
- Shape the dough: Lightly flour your work surface and turn out the dough gently. Using floured hands or a bench scraper, fold it over itself once or twice to form a round loaf. Avoid deflating the air pockets.
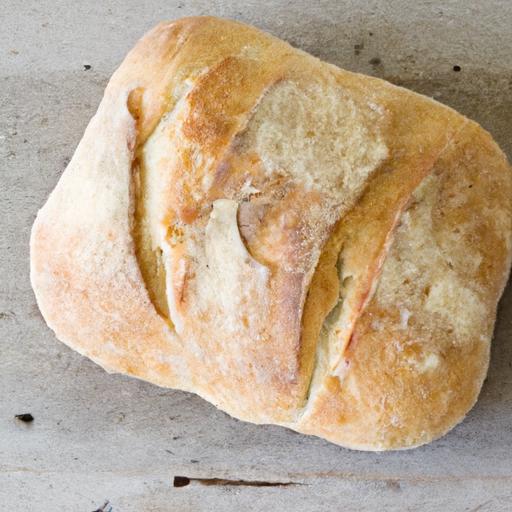
- Transfer and score: Carefully remove the hot Dutch oven, place the dough inside on a piece of parchment, and score the top with a sharp knife or lame to control expansion.
- Bake with lid on: Cover and bake for 30 minutes to trap steam, essential for a blistering crust.
- Finish uncovered: remove the lid and bake for an additional 15 minutes until deep golden brown and crisp.
- cool properly: Transfer the loaf to a wire rack and let it cool fully before slicing to preserve crumb texture.
Expert Tips for Achieving a Crispy Crust and Flavorful Interior
To elevate your effortless no-knead artisan bread experience, embrace the balance between patience and precision. Maintaining a high hydration dough ensures an open crumb but handle the dough gently to keep air pockets intact.For even more crunch, bake on a preheated baking stone if a Dutch oven is unavailable, and add a tray of boiling water on the oven floor for steam. If the crust becomes too dark before the loaf is done, tent it loosely with foil. Always rest the bread fully before slicing; warm bread can compress and become gummy.
Tips for Success
- Use filtered or spring water for clearer fermentation and flavor.
- Adjust fermentation time slightly based on room temperature; warmer conditions shorten rise time.
- Experiment with adding seeds or herbs to the dough for custom artisan flair.
- If your dough feels too wet, dust lightly with flour, but less is better to retain moisture.
- Leftover bread keeps best when stored in a paper bag at room temperature for up to 3 days.
Serving Suggestions
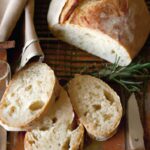
This artisan loaf shines when sliced thick and served with rich butter or drizzled with flavorful olive oil and flaky sea salt. It pairs beautifully alongside hearty soups, fresh garden salads, or a vibrant bruschetta topping. For an elegant touch, sprinkle freshly chopped herbs like rosemary or thyme over warm slices.A side of whipped ricotta or a creamy hummus makes an irresistible complement.

| Nutrient | Per Serving (1 slice) |
|---|---|
| Calories | 160 kcal |
| Protein | 5 g |
| Carbohydrates | 32 g |
| fat | 0.5 g |
for more artisan baking inspiration, check out our Sourdough Bread Basics. To deepen your understanding of yeast fermentation science, visit Science of Bread.
Q&A
Q&A: Effortless No-Knead Artisan Bread – Bake Like a Pro at Home
Q: What exactly is no-knead artisan bread?
A: No-knead artisan bread is a rustic-style loaf that develops a chewy crumb and crispy crust with zero heavy lifting. Instead of kneading, it relies on long fermentation and simple ingredients to build flavor and texture, making it a game-changer for home bakers craving professional results without the fuss.
Q: How does skipping kneading affect the bread?
A: Skipping kneading might sound risky, but the magic lies in time. The extended rise allows natural gluten advancement, which tautly stretches the dough’s structure on its own. This slow process creates that signature airy, chewy crumb and a beautifully blistered crust that artisan loaves are famous for.
Q: What ingredients do I need for this no-knead bread?
A: You only need four basics: high-quality flour, water, salt, and yeast. That’s it! With minimal ingredients and simple steps, the dough comes alive and transforms into a golden masterpiece. No fancy gadgets or additives required.
Q: How long should I let the dough rise?
A: Patience is key! Generally, the dough needs to rest for 12 to 18 hours at room temperature. This slow fermentation builds flavor complexity and the perfect dough structure. Overnight rising is a common and convenient approach for many bakers.
Q: Do I really need a Dutch oven?
A: While not mandatory, a Dutch oven is a baker’s secret weapon for artisan bread. It traps steam as you bake,creating that shiny,crackly crust that’s hard to replicate otherwise. If you don’t have one, a covered roasting pan or baking stone with a pan of water works, too.
Q: Can I customize the bread with additions like seeds or herbs?
A: Absolutely! Toss in your favorites-roasted garlic, rosemary, sunflower seeds, or olives-right after mixing the dough. Just fold them in gently to avoid deflating the dough. These add exciting textures and aromas that take your loaf to the next level.Q: What’s the best way to store leftover no-knead bread?
A: To keep that crust crisp, store the bread in a paper bag or wrapped loosely in a clean linen towel at room temperature for up to 2 days. For longer storage, slice and freeze it in an airtight bag, then toast slices directly from frozen to revive freshness.
Q: Can beginners pull off no-knead artisan bread successfully?
A: Absolutely! This method was designed to make artisanal baking accessible to everyone. It’s forgiving versus traditional bread-making techniques,perfect for beginners looking to impress family and friends without intimidation.
Q: how can I tell when my bread is fully baked?
A: The bread is ready when it boasts a deep golden-brown crust and sounds hollow when tapped on the bottom. Internal temperature around 200-210°F (93-99°C) also ensures a perfectly baked crumb.
Q: Any tips to elevate my no-knead bread experience?
A: Use filtered or spring water, maintain consistent room temperature, and don’t rush the fermentation. Experiment with different flours-whole wheat or rye can add marvelous character. Lastly, embrace the imperfections; each loaf tells your baking story!
Insights and Conclusions
Baking artisan bread at home doesn’t have to be a daunting task reserved for seasoned pros. With the effortless no-knead method, you can transform simple ingredients into a golden, crusty masterpiece that fills your kitchen with the comforting aroma of freshly baked goodness. So, dust off your mixing bowl, embrace the beauty of patience, and let the magic of slow fermentation do the work for you. Whether you’re a beginner or a bread enthusiast, this approachable technique invites you to savor the art of homemade bread-one rustic loaf at a time. Happy baking!