There’s something undeniably magical about pulling a golden, bubbling pizza fresh from teh oven-the crispy yet chewy crust, the rich aroma of melting cheese, and the perfect balance of flavors in every bite. while store-bought dough can be a convenient shortcut, crafting your own homemade pizza dough transforms the entire experiance from ordinary to remarkable. In this step-by-step guide, we’ll unlock the secrets behind creating that ideal base: tender yet sturdy, with just the right chew and a flavor that sings. Whether you’re a seasoned home cook or a curious beginner, prepare to roll up your sleeves and dive into the art and science of perfect pizza dough, because the best pies start from the very first knead.
Choosing the Right Flour for Light and Chewy Pizza Crust
Crafting perfect homemade pizza dough begins with selecting the ideal flour. This essential step influences the texture, elasticity, and overall chewiness of your crust. For that quintessential light and chewy bite, high-protein bread flour is a game-changer. Its elevated gluten content, usually around 12-14%, forms a strong, stretchable network, capturing air bubbles during fermentation and baking for an airy yet resilient base.
Alternatively, a blend of 00 flour-finely milled Italian flour-combined with bread flour can add silkiness and a slight tenderness to the dough without compromising strength. While all-purpose flour can work in a pinch, its lower gluten content yields a softer, less chewy crust, more cake-like than traditional Neapolitan-style pizza. Experimenting with flour types and ratios is a joyful part of customizing your perfect homemade pizza dough experience.
Mastering the Dough Mixing Process for Consistent Results
Properly mixing dough transforms disparate ingredients into a harmonious, elastic mass primed for fermentation. Begin by dissolving yeast in warm water (around 105°F/40°C) to activate it gently-too hot and you risk killing the yeast, too cold and activation is sluggish. Stir in the flour gradually while mixing to avoid lumps and ensure even hydration.
Use your hands or a stand mixer fitted with a dough hook to knead for about 8-10 minutes until the dough becomes smooth, elastic, and just slightly tacky. When pressed lightly, it should slowly bounce back-a clear sign the gluten is well developed. Under-kneaded dough lacks structure and won’t rise properly, while over-kneading can make it tough. pay close attention to texture; this mastery is key for consistent, perfect homemade pizza dough every time.
Unlocking the Secrets of Proper Dough Fermentation and Rising
Dough fermentation is where flavor and texture truly blossom. After kneading, transfer your dough to an oiled bowl, cover with a damp cloth or plastic wrap, and let it rise in a warm, draft-free spot. Ideally, aim for a 1- to 2-hour bulk fermentation until the dough doubles in volume. This resting period allows natural yeast activity to release flavorful organic acids and carbon dioxide, creating those coveted bubbles for a light interior.
For richer flavor complexity, consider a cold fermentation by refrigerating the dough for 24-72 hours. This slow rise deepens the taste and enhances chewiness through extended enzyme activity. Before baking, let refrigerated dough come to room temperature 30 minutes prior for easier shaping. Mastering fermentation converts simple ingredients into your perfect homemade pizza dough’s delightful soul.
Tips for Shaping and Stretching Dough Without Tearing
The tactile art of shaping pizza dough is both a science and a joy. Flour your work surface lightly to prevent sticking, but avoid excess as it can dry the dough. gently press your dough ball into a disc with fingers, leaving a slightly thicker edge to form the crust. Using your knuckles, stretch the dough from the center outward with slow, controlled pulls to preserve air pockets. Resist the urge to use a rolling pin, which presses out those precious bubbles and yields a denser crust.
If the dough resists stretching or shrinks back, allow it to rest for 5-10 minutes to relax the gluten. Patience hear ensures a perfectly thin yet sturdy base ready to hold your favorite toppings without tearing or sagging.
Prep and Cook Time
- Prep Time: 20 minutes
- Fermentation: 1 to 72 hours (depending on preferred method)
- Cook time: 7-10 minutes (at 475°F/245°C)
Yield
Makes 2 medium 12-inch pizzas
Difficulty Level
Medium – requires attention to detail but rewarding even for home cooks
Ingredients
- 3 cups bread flour (or 2 cups bread flour + 1 cup 00 flour)
- 1 cup warm water (about 105°F/40°C)
- 2 ¼ teaspoons active dry yeast (one packet)
- 1 ½ teaspoons salt
- 1 tablespoon olive oil (plus extra for bowl)
- 1 teaspoon sugar
Instructions
- Activate yeast: in a small bowl, combine warm water and sugar, sprinkle yeast over the surface.Let sit 5-10 minutes until foamy.
- Mix dough: In a large bowl, mix flour and salt. Pour in yeast mixture and olive oil. Stir with a wooden spoon until shaggy dough forms.
- Knead: Transfer to a floured surface and knead 8-10 minutes until smooth and elastic. Alternatively, use a stand mixer with a dough hook on medium speed.
- First rise: Lightly oil a clean bowl,place dough inside,cover tightly with plastic wrap. Let rise in a warm spot until doubled, about 1-2 hours.
- Optional cold fermentation: after initial rise, punch down dough, divide into two balls, place in sealed containers, refrigerate for 24-72 hours.
- Prepare to bake: Remove dough from fridge 30 minutes before baking, allow to reach room temperature.
- Shape dough: Flour work surface lightly, gently stretch dough into 12-inch rounds, leaving a thicker edge for the crust.
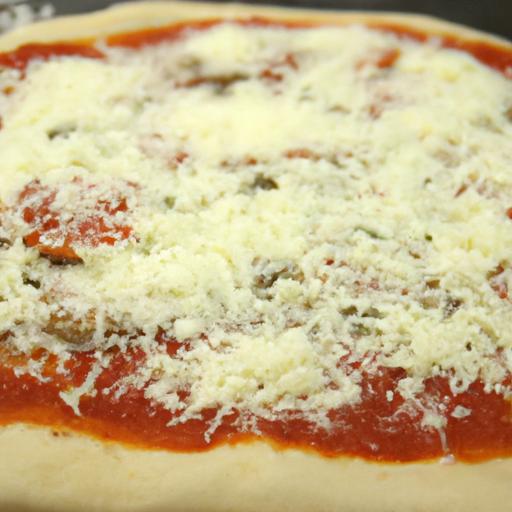
- Add toppings & bake: Preheat oven to 475°F (245°C) with a pizza stone if available. Add your favorite toppings and bake 7-10 minutes until golden and bubbly.
Chef’s Notes
- For an even crisper crust, add 1 teaspoon of sugar or honey to feed the yeast.
- Gluten-free? substitute with a pre-mixed gluten-free flour blend designed for yeast doughs,adjusting hydration slightly.
- If dough feels sticky, sprinkle with flour a little at a time during kneading-not too much or crust becomes tough.
- Make ahead: Dough can be frozen after first rise in airtight bags for up to 1 month. Thaw overnight in the fridge before using.
- Use a pizza peel dusted with semolina flour for easy transfer to the stone or oven tray.
Serving Suggestions
Slice your homemade pizza fresh from the oven and garnish with fresh basil leaves, a drizzle of extra-virgin olive oil, or a sprinkle of flaky sea salt. Pair with a crisp green salad and perhaps a glass of Italian red wine for a perfect,authentic dining experience.leftover crusts make fantastic snacks toasted with garlic butter or as the base for mini flatbreads.
| Nutritional Info (per serving) | Calories | Protein | Carbs | Fat |
|---|---|---|---|---|
| One Medium pizza | 320 kcal | 12 g | 55 g | 6 g |

For more detailed techniques on dough handling and baking, check out our Advanced Pizza Making Techniques. To deepen your understanding of yeast fermentation science, this ScienceDaily article offers astonishing insights.
Q&A
Q&A: Crafting Perfect Homemade Pizza Dough - A Step-by-step Guide
Q1: Why should I make my own pizza dough rather of buying pre-made?
Making your own pizza dough allows you to control the ingredients, ensuring freshness and avoiding preservatives. Plus, it’s incredibly satisfying to craft a dough that’s perfectly tailored to your taste, with that irresistible chew and crispness that store-bought versions rarely match.
Q2: What are the essential ingredients for homemade pizza dough?
Simply put,flour,water,yeast,salt,and a touch of olive oil are your core players. High-protein flour (like bread flour) gives you better gluten progress, which means a chewier, airier crust. Yeast is the magic that makes your dough rise, creating those beautiful bubbles and crust texture.
Q3: How do I no if my yeast is still active?
Easy! Mix your yeast with warm water (around 105°F or 40°C) and a pinch of sugar. If it starts to foam and bubble within 5-10 minutes, congratulations! Your yeast is alive and ready to work its rising magic. If not, it’s time to get a fresh packet.
Q4: Can I make pizza dough ahead of time?
Absolutely! In fact, slow fermentation in the fridge for 24 to 72 hours enhances flavor and texture dramatically. Just cover your dough tightly and chill it – the yeast works slowly, deepening the taste and making the dough easier to stretch.
Q5: What’s the secret to stretching the dough perfectly?
Patience and technique! Let your dough rest at room temperature so the gluten relaxes, then gently press from the center outward, rotating as you go. Avoid using a rolling pin, which can push out precious air bubbles and make the crust dense.
Q6: How hot should my oven be for baking homemade pizza?
The hotter, the better! Aim for 475-500°F (245-260°C). If you have a pizza stone or steel, preheat it for at least 30 minutes before baking. That intense heat mimics wood-fired ovens, giving you a beautifully blistered, crisp crust.
Q7: Can I customize the dough for different styles of pizza?
Definitely. For a thin-crust pizza, roll the dough a bit thinner and bake a little shorter. For a thicker, fluffier style like focaccia or Sicilian, add a bit more yeast and allow for longer rising times. Adjust hydration (water content) slightly to change the texture too.
Q8: Are there common pitfalls I should avoid?
Overworking your dough can create a tough crust, while under-kneading won’t develop enough gluten for stretchiness. Also, don’t skimp on the resting times-rushing the rise can lead to dense, flavorless dough.Lastly, baking at too low a temperature results in a pale, soggy crust instead of that golden perfection.
Q9: What’s the best way to store leftover dough?
Wrap it tightly in plastic wrap and pop it in the fridge for up to 3 days, or freeze it for up to 3 months. When you’re ready to bake,let the dough thaw and come to room temperature before stretching.
Q10: Can I experiment with different flours or add-ins?
Absolutely! Whole wheat,spelt,or gluten-free mixes can all bring unique flavors and textures. Adding herbs, garlic, or even cheese into the dough can make for exciting variations-just keep in mind these additions might affect the hydration and rising time.
Crafting homemade pizza dough is both an art and a science-embrace the process, and soon you’ll be spinning out pizza masterpieces straight from your own kitchen!
Wrapping Up
With your newfound knowlege and hands dusted in flour, crafting perfect homemade pizza dough is no longer a daunting task but an art you can confidently master. Each step,from mixing to kneading and resting,transforms simple ingredients into a versatile canvas awaiting your favorite toppings. So, roll up your sleeves, embrace the process, and let your kitchen be filled with the irresistible aroma of freshly baked pizza-because the perfect slice begins with the perfect dough. Happy baking!