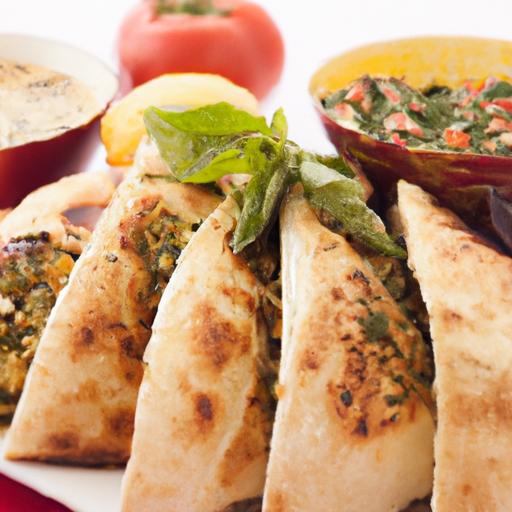
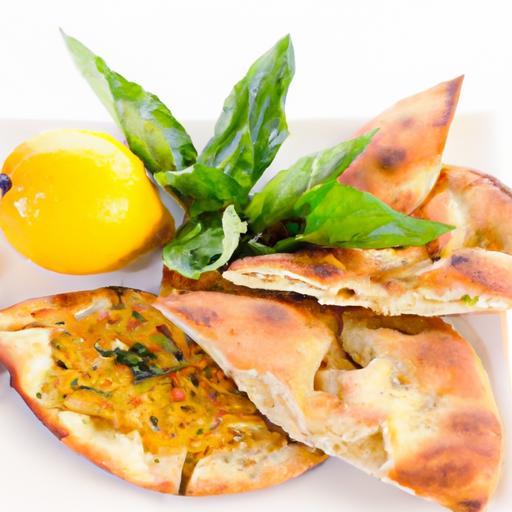
There’s something undeniably magical about pulling a warm, fluffy pita bread fresh from your own oven-a tender pocket ready to cradle your favorite fillings or soak up vibrant dips. Now, imagine elevating this beloved Middle Eastern staple with an aromatic sprinkle of za’atar, infusing each bite with a symphony of earthy herbs, tangy sumac, and toasted sesame seeds. Mastering the art of homemade pita bread with a za’atar twist is not just about baking; it’s a delicious journey into tradition, flavor, and the simple joy of crafting something truly authentic at home. Ready to unlock the secrets behind perfect pitas and awaken your palate to new dimensions? Let’s dive into the timeless techniques and spirited flavors that will transform your kitchen into a fragrant haven.
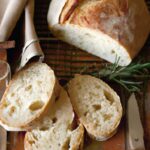
Master the art of homemade pita bread with za’atar twist begins with selecting the perfect flour, a step that ensures the fluffiest, moast authentic pockets you’ll love tearing open. In Middle Eastern kitchens, the flour’s quality sets the foundation for that iconic puff-a tender interior enveloped by a lightly crisp exterior. While all-purpose flour offers accessibility and decent structure, opting for a high-gluten bread flour will give your pita superior elasticity and rise, transforming your dough into those airy, puffed-up pockets you crave.
Prep and Cook Time
- Preparation Time: 20 minutes
- rising Time: 1 hour 30 minutes
- Cooking Time: 10 minutes
- Total Time: Approximately 2 hours
Yield
Makes 8 medium-sized pita breads
Difficulty Level
Medium – ideal for enthusiastic home bakers ready to perfect thier kneading and baking skills
Ingredients
- 3 cups bread flour, sifted for lightness
- 1 cup lukewarm water (approx. 105°F/40°C)
- 1 teaspoon active dry yeast
- 1 teaspoon sugar
- 1 teaspoon salt
- 2 tablespoons olive oil, plus extra for brushing
- 2 tablespoons za’atar spice blend, for folding and garnish
- Optional: sesame seeds for sprinkling
Instructions
- Activate the yeast: In a small bowl, combine the lukewarm water, sugar, and yeast. Stir gently and let it bloom for 5-10 minutes until foamy and fragrant-this signals your yeast is alive and ready.
- Mix dry ingredients: In a large bowl, whisk together the bread flour and salt. Make a well in the center for the wet ingredients.
- Combine and mix: Pour the yeast mixture and olive oil into the flour well. Using a wooden spoon, slowly incorporate the flour into the wet ingredients until a shaggy dough forms.
- Knead the dough: Transfer the dough onto a clean, lightly floured surface. Knead vigorously for 8-10 minutes until smooth, elastic, and slightly tacky to the touch. The gluten development here is key to those perfect fluff pockets.
- First rise: Lightly oil a clean bowl and place the dough inside, turning it to coat with oil. Cover with a damp cloth or plastic wrap and let it rise in a warm place for 1 hour, or until doubled in size.
- Incorporate za’atar: Gently deflate the dough and turn it out onto your surface. Fold in 2 tablespoons of za’atar evenly, kneading just a few times to evenly distribute without overworking the dough.
- Divide and shape: Cut the dough into 8 equal portions. Shape each into a smooth ball. Cover loosely with a cloth and rest for 20 minutes-this resting relaxes the gluten and makes shaping easier.
- Roll out: using a rolling pin, flatten each ball into a circle about 6-7 inches in diameter and ¼ inch thick. Brush lightly with olive oil and sprinkle with a pinch of za’atar or sesame seeds for an aromatic crust.
- Preheat your oven: place a baking stone or inverted baking tray on the middle rack.Preheat the oven to its highest temperature (475°F-500°F / 245°C-260°C) for at least 30 minutes. The extreme heat creates steam bursts that puff the bread.
- Bake the pita: Using a pizza peel or flat baking sheet lined with parchment,transfer 2-3 pita rounds onto the hot baking surface. bake for 3-4 minutes until puffy and lightly golden.The pita should inflate dramatically-avoid opening the oven door during baking.
- Cool and store: Remove pita with tongs and transfer onto a cooling rack. Wrap the warm pita in a clean kitchen towel to keep soft. Repeat with remaining dough.
Tips for Success
- Using bread flour is the secret to achieving the classic fluffy texture.If unavailable, all-purpose flour can suffice but expect slightly less puff.
- Kneading well helps develop gluten, essential for the dough to trap steam and create a pocket.
- Incorporating za’atar inside the dough infuses subtle herbal notes; brush some on top before baking for a more robust flavor and visual appeal.
- Don’t skip preheating the baking stone or tray; it mimics the traditional hot oven floors in Middle Eastern bakeries.
- If the pita aren’t puffing fully, try rolling them slightly thicker or letting the dough rest a bit longer before baking.
- Leftover pita can be refreshed in a toaster or hot skillet for a few seconds before serving.
Serving Suggestions
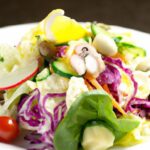
Serve your freshly baked pita warm, sliced open and stuffed with roasted vegetables, hummus, or a vibrant shawarma salad for a true Middle Eastern experience. Drizzle with olive oil and sprinkle additional za’atar on top for a zesty finish. For an elegant touch, accompany with a side of creamy labneh and pickled turnips. The aromatic za’atar crust paired with the fluffy interior creates a canvas bursting with flavor and texture-perfect for dipping or wrapping.
| Nutritional Information (per pita) | Amount |
|---|---|
| Calories | 160 kcal |
| Protein | 5 g |
| Carbohydrates | 30 g |
| Fat | 3 g |

For a deeper dive into kneading and gluten development, check out our complete bread kneading guide. Expand your Middle Eastern pantry by exploring za’atar’s rich heritage on Britannica.
Q&A
Q&A: Master the Art of Homemade Pita Bread with Za’atar Twist
Q1: What makes pita bread unique compared to other flatbreads?
A1: Pita bread is a marvel of Middle Eastern baking, known for its characteristic “pocket.” This pocket forms as the dough puffs up in the oven, creating a perfect vessel for fillings. Its soft yet slightly chewy texture, combined with the ability to hold delicious ingredients, sets pita apart from other flatbreads.
Q2: Why add za’atar to homemade pita bread?
A2: Za’atar is a fragrant Middle eastern spice blend that typically combines thyme, sesame seeds, sumac, and salt. sprinkling za’atar on pita bread before baking introduces a vibrant,earthy flavor with tangy and nutty notes,transforming a simple staple into a sensory delight that celebrates tradition and creativity.
Q3: What basic ingredients do I need to make pita bread at home?
A3: The beauty of pita is its simplicity: all you need are flour,water,yeast,salt,and a touch of olive oil. Za’atar adds the special twist post-dough, and optional olive oil enhances flavor and crispness without overshadowing the bread’s natural charm.
Q4: How can I achieve the perfect “pocket” in my pita bread?
A4: The secret lies in dough hydration,kneading,and high-temperature baking. A well-hydrated dough creates steam inside the pita during baking, which causes it to puff up and form the iconic pocket. Baking on a hot surface, like a cast-iron skillet or baking stone preheated in the oven, helps capture that steam quickly for optimal puff.
Q5: Can I make the za’atar topping from scratch?
A5: Absolutely! Creating your own za’atar is a delightful journey into Middle Eastern flavors. Combine dried thyme, sumac, toasted sesame seeds, and a pinch of sea salt. Adjust the proportions to suit your taste, and feel free to experiment by adding oregano or marjoram for a personal touch.Q6: Are there any tips for shaping pita dough to get consistent rounds?
A6: Yes! After letting your dough rise, divide it into equal portions and gently roll each into smooth balls. Rest them for a few minutes to relax the gluten, then roll out into uniform circles about ¼ inch thick. Keeping the dough consistent in thickness helps the pitas puff evenly.
Q7: How should I store homemade pita bread so it stays fresh?
A7: cool your baked pitas wholly before storing. Wrap them in a clean kitchen towel or place in an airtight container to retain softness. For longer storage, pita bread freezes beautifully; just thaw them wrapped in a towel and warm briefly before serving.
Q8: Besides the classic filling, what are some creative ways to enjoy za’atar pita bread?
A8: Za’atar pita is incredibly versatile! Slice it into triangles and bake into crisp chips perfect for dipping in hummus or baba ganoush.Use it as a base for a Mediterranean-style sandwich with roasted vegetables, grilled halloumi, or a fresh herb salad. Or tear it up into warm soups as a savory, za’atar-flavored garnish.
Q9: Can I make pita bread without yeast?
A9: Traditional pita relies on yeast for its characteristic puff and texture, but schnelle, yeast-free versions exist using baking powder or soda. However, they won’t develop the same pocket or airy softness, making yeast the magic ingredient if authentic pita is your aim.
Q10: How dose sumac in za’atar enhance pita bread’s flavor?
A10: Sumac brings a subtle tartness and citrusy brightness that balances the earthiness of thyme and nuttiness of sesame seeds in za’atar.When scattered atop warm pita, it sharpens the palate and elevates every bite with a lively zing.Mastering homemade pita with a za’atar twist unlocks a world of fragrant, warm, and satisfying flavors that echo centuries of culinary tradition-right from your own oven!
The Way Forward
As you tuck into your warm, freshly baked pita sprinkled with aromatic za’atar, you’re not just enjoying a meal-you’re embracing a rich tapestry of tradition, flavor, and creativity. Mastering homemade pita bread with a za’atar twist invites you to connect with ancient culinary roots while adding your own unique stamp to the table. So grab your rolling pin, sprinkle that fragrant blend, and let your kitchen become a gateway to the vibrant world of Middle Eastern cuisine. With each soft, pillowy bite, you’re not just eating bread-you’re savoring a story, one delicious layer at a time.